
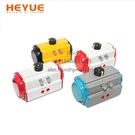


Hey there! As a supplier of Double Acting Pneumatic Actuators, I often get asked about how to inspect the internal components of these nifty devices. So, I thought I'd put together this blog post to share some tips and tricks on the topic.
First off, let's quickly go over what a double acting pneumatic actuator is. A double acting pneumatic actuator uses compressed air to move a piston in both directions. This makes it great for applications where you need precise control and movement in both directions. You can check out more about Double Acting Pneumatic Actuator on our website.


Now, let's dive into the inspection process. Before you start inspecting the internal components, it's important to make sure the actuator is properly shut down and isolated from the power source. This is a safety measure to prevent any accidental movement or injury.
Step 1: Exterior Inspection
The first step in inspecting a double acting pneumatic actuator is to take a good look at the exterior. Check for any signs of damage, such as cracks, dents, or corrosion. These issues can not only affect the performance of the actuator but also pose a safety risk. If you notice any significant damage, it might be a good idea to replace the actuator.
Also, check the mounting bolts and connections. Make sure they are tight and secure. Loose bolts can cause the actuator to vibrate or move out of position, which can lead to premature wear and tear.
Step 2: Remove the End Caps
Once you've completed the exterior inspection, it's time to remove the end caps. This will give you access to the internal components of the actuator. Most double acting pneumatic actuators have end caps that are held in place by bolts or screws. Use the appropriate tools to carefully remove these fasteners and set them aside in a safe place.
Step 3: Inspect the Piston
The piston is one of the most important components of a double acting pneumatic actuator. It's responsible for converting the energy from the compressed air into linear or rotary motion. When inspecting the piston, look for any signs of wear, such as scratches, grooves, or scoring. These can indicate that the piston is not moving smoothly or that there is excessive friction.
Also, check the piston seals. The seals are what prevent the compressed air from leaking out of the actuator. If the seals are damaged or worn, they can cause a loss of pressure and reduce the efficiency of the actuator. Replace any damaged seals as soon as possible.
Step 4: Check the Cylinder
The cylinder is the housing that holds the piston. It's important to inspect the cylinder for any signs of damage or wear. Look for scratches, dents, or corrosion on the inside of the cylinder. These can affect the movement of the piston and cause leaks.
If you notice any significant damage to the cylinder, it might be necessary to replace it. However, in some cases, minor damage can be repaired by honing or re - boring the cylinder.
Step 5: Inspect the Rack and Pinion (if applicable)
Some double acting pneumatic actuators use a rack and pinion mechanism to convert linear motion into rotary motion. If your actuator has a rack and pinion, it's important to inspect these components as well. Check the teeth of the rack and pinion for any signs of wear or damage. Worn teeth can cause the actuator to slip or not operate smoothly.
You can learn more about Rack and Pinion Pneumatic Actuator on our site if you're interested in the details of this mechanism.
Step 6: Examine the Springs (if applicable)
In the case of a spring return pneumatic actuator, which is a variation of the double acting actuator, the springs play a crucial role. The springs are used to return the actuator to its original position when the air pressure is removed. Inspect the springs for any signs of damage, such as breaks or corrosion.
A damaged spring can cause the actuator to malfunction or not return to its proper position. You can find more about Spring Return Pneumatic Actuator to understand how these springs work in the system.
Step 7: Check the Bearings and Bushings
Bearings and bushings are used to reduce friction and support the moving parts of the actuator. Inspect these components for any signs of wear or damage. Worn bearings or bushings can cause the actuator to operate noisily or not move smoothly.
If you find any damaged bearings or bushings, replace them immediately. This will help to ensure the long - term performance of the actuator.
Step 8: Reassemble the Actuator
Once you've completed the inspection and replaced any damaged components, it's time to reassemble the actuator. Make sure to clean all the components thoroughly before putting them back together. Use the appropriate lubricant on the moving parts to reduce friction and prevent wear.
Tighten the end caps and mounting bolts to the specified torque. This will ensure that the actuator is properly assembled and ready for use.
Step 9: Test the Actuator
After reassembling the actuator, it's important to test it to make sure it's working properly. Connect the actuator to the compressed air supply and operate it through its full range of motion. Check for any leaks, abnormal noises, or jerky movements.
If you notice any issues during the test, disassemble the actuator again and re - check the components. Make any necessary adjustments or replacements until the actuator is operating smoothly.
Well, there you have it! That's a basic guide on how to inspect the internal components of a double acting pneumatic actuator. If you're in the market for high - quality double acting pneumatic actuators or need more information about our products, don't hesitate to reach out. We're always happy to help you with your procurement needs and have a good chat about how our products can fit into your applications. Contact us today to start the conversation!
References
- "Pneumatic Actuator Handbook" - A comprehensive guide on pneumatic actuator technology and maintenance
- Industry best - practices guidelines from leading pneumatic actuator manufacturers